
[Y]ou will only ever have one set of hands and one set of feet, for this reason proper care should be given to maintaining them - especially if you are a weightlifter, bodybuilder, or regular Joe gym rat and spend a lot of time with weights in your hands. The knurling on the barbells and dumbbells can be rough on your hands and cut them up, not to mention all the sweat, chalk, dirt and grime that is on the weights and rubs into your hands.
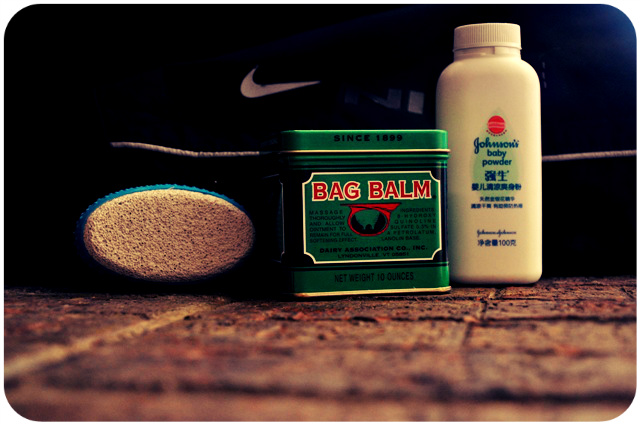
Earlier, we have discussed 6 Things That Should Be in Every Gym Bag, which includes the usual suspects like keeping a towel, chalk, straps and water. Today, we will look at 3 grooming products that will help you take care of your hands and feet and that can be easily kept in your gym bag.
1) Baby Powder
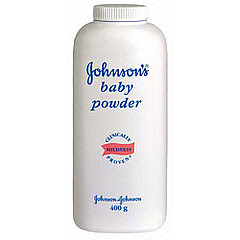
Baby powder is a must. Baby powder will keep your feet stink free and, more importantly, dry. Generously dumping some baby powder into your socks can help to soak up any sweat and keep those feet dry and healthy.
Moist feet can cause warts, athletes foot, toenail fungus, rashes, eczema, and other nasty and itchy skin infections. Simply keeping your feet dry can prevent most foot problems.
Before I discovered the majesty of baby powder I used to get athlete’s foot once or twice a year and I’d go crazy trying not to itch them. Nowadays I always keep a tube of baby powder in my gym bag and usually a tube in the house somewhere and I always powder up my feet before I leave the house. When I’m inside I never wear socks.
Baby powder can be purchased almost anywhere and runs about 2-4 bucks per tube. You can throw a bottle of baby powder in your gym bag and liberally dump some powder in your socks before your workout to keep them dry, but be sure to change socks after a workout. Wet socks won’t do much to prevent nasty foot infections.
On a side note, I used to get athletes foot not from athletics but from being sedentary at the office. Wearing dress socks and dress shoes everyday, my feet would tend to sweat and I’d get some nasty rashes that itched like a beast. Baby powder cured all that. If you’re wearing socks all day, baby powder is an absolute must to keep your feet dry and healthy.
2) A Pumice Stone

A pumice stone? Isn’t that for girls?
Yes. But…
If you are actually lifting weights and not playing around with baby weights you will have developed some gnarly calluses on your palms.
Until recently I did not put any emphasis on hand care, which is silly because I had badass calluses all over my hands. When I’d hold a beautiful blonde baby she’d yell “oww” because my ruff and gruff mitts would feel like sandpaper on her skin. My calluses would damn near cut up any skin that they touched. The calluses would get gigantic and then eventually they’d rip off when I’d do heavy shrugs or heavy partial deadlifts, or they’d get so unmanagable I’d cut them off with scissors or nail clippers or just rip them off myself. I thought that there was no solution and that I was condemned to have rough mitts for eternity.
But that was before I was introduced to the magic of the pumice stone via Donny Shankle.
Enter Donny Shankle….
Donny Shankle, when he isn’t punking out muggers at Disneyland, is an American weightlifter who has released a very helpful video about proper hand care for the weightlifter.
Before Donny released his video I’d never considered using a pumice stone to file down the calluses on my palms, I’d just end up ripping the damn things off eventually. I thought the pumice stone was some baloney that women used on their feet.
Well, I watched the video, I saw Donny file down the calluses on his palms, I looked down at my sandpaper palms, a revelation occurred and I promptly made trip to the local drug store to pick up a pumice stone.
And what a difference it made. I picked a pumice stone up for about 8 bucks and filed those gnarly calluses down into something resembling civilized hands.
I actually lost the pumice stone I had and my hands went from human to mutant in about two weeks, those calluses just came right back and I made another trip to the girly section of the drug store to grab another pumice stone.
A $7 or $8 dollar investment for hand care is a no-brainer. Pick one of these things up, file those mutant hands into human hands and stop worrying about cutting up your girlfriends delicate skin.
What about gloves, wouldn’t gloves take care of calluses?
Gloves are for girls.
3) Bag Balm
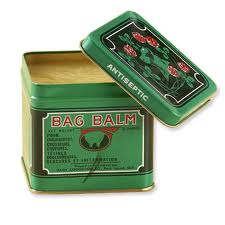
Bag balm is another trick I picked up from the Donny Shankle hand care video. Balm is like lotion except it is a thicker, yellowish wax and must be rubbed into the skin. Personally, I hate lotion and I never use it. I hate the way it feels and I hate the way it leaves your hands greasy and you can’t touch anything.
However, the hands can really take a beating from the knurling on barbells and dumbbells and they should be taken care of properly.
I have noticed that after filing down the calluses my hands are a little tender and itchy so I went ahead and grabbed some bag balm to give them a little moisture and take care of that dry itch.
What you will want to do is rub the balm into your hands, the palms, and in between the fingers. Your hands will be greasy for about 20 minutes until the balm soaks in. What I do is rub it in the palms and in between the fingers and then I use a paper towel to sop up some of the extra balm and to dry off my fingertips.
Using the bag balm once or twice a week should be plenty for normal hand care. If you live in a cold, dry place you may want to apply the balm every day, especially if you have dry and cracking skin.
A big tub of bag balm runs about $10 at any local pharmacy or drug store and the tube should last about a year.
Note: Badger Balm![]() may be a better choice to keep in your gym bag, it is similar to bag balm and it comes in a smaller round container and is lighter and easier to carry.
may be a better choice to keep in your gym bag, it is similar to bag balm and it comes in a smaller round container and is lighter and easier to carry.
———————————————-
Be sure to take care of your hands and feet, they are the only hands and feet you will ever have. When you get a moment, run up to your local drug store and get your care package and then toss them in your gym bag for safe keeping. You’ll be glad you did.
Until next time,
-Victor Pride


Featured Comment
Andy